
Setting Up a Debugging Environment in webpack
Getting Started with webpack
Once you start developing with a frontend framework like Vue.js, using webpack becomes unavoidable. webpack provides webpack-dev-server, which acts as a local web server during development. Configuring webpack is fairly complex, but most frontend frameworks have their own ecosystems, so if you just use what a command-line tool like Vue CLI sets up for you, you can spin up a web server easily. The following explanation is based on Vue CLI 2. Other frameworks work the same way. (For Vue CLI 3, please refer to this post)
Setting Up the Frontend Debugging Environment
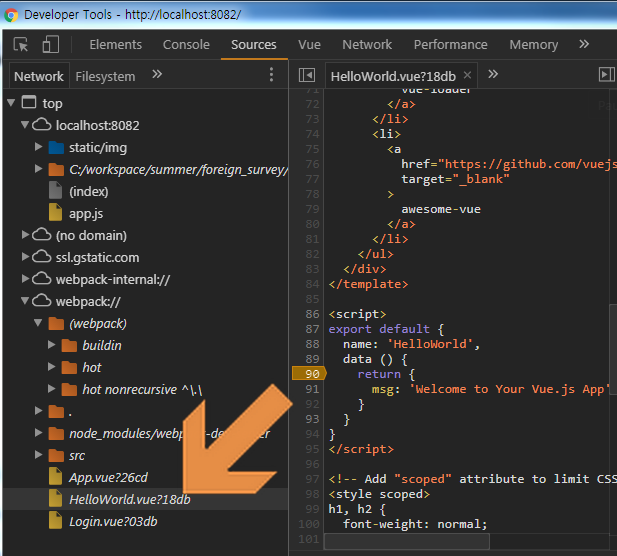
In most cases, webpack’s default configuration alone will let you debug using your browser’s developer tools. However, there is one slightly confusing thing. When debugging JavaScript, you can’t set a break point on the source code under localhost the way you used to. You have to set a break point on the code connected through webpack’s source-map to be able to debug. As indicated by the arrow in the screenshot below, set your break point on the code under webpack://.
If this doesn’t work, then webpack-dev-server hasn’t been configured for debugging. You just need to change the devtool setting.
// config/index.js
devtool: 'cheap-module-eval-source-map'
Besides cheap-module-eval-source-map, there are several other options for the devtool setting. Refer to the official documentation and (Webpack) devtool option performance to configure it.
Setting Up the Backend Debugging Environment
If you’re a cash-strapped full-stack developer, you have to run both the frontend and backend servers in your local environment while developing. In this case, if you haven’t done any special configuration, HTTP requests won’t be sent from the frontend to the backend. This is because the requests are sent to the frontend server (in this case, the web server that webpack-dev-server spun up in your local environment). You need to send the requests to the backend. Refer to the example below and set up a proxyTable in webpack.
// config/index.js
    proxyTable: {
      '/api': {
        target: 'http://localhost:my_backend_port/api',
        changeOrigin: true,
        pathRewrite: {
          '^/api': ''
        }
      }
    }
In the example above, the name is proxyTable, but that’s how [vue-cli] set up its webpack configuration; in the [webpack] official documentation and elsewhere, it’s usually configured under the name proxy. You can set it up as follows.
// webpack.config.js
devServer: {
    host: '127.0.0.1',
    port: 8010,
    proxy: {
      '/counsel/apply/api': { // /counsel/apply/api is just an example
        target: 'https://dev_server_URL/counsel/apply/api',
        changeOrigin: true,
        pathRewrite: {
          '^/counsel/apply/api': ''
        }
      }
    }
  }
If you want to learn more about this technique, read up on http-proxy-middleware.

Leave a comment